Print or export a schedule
Print a schedule
- Go to Projects and select the appropriate project in the Quick Select section.
- On the Project Home page, select Scheduling Overview or Schedules in the Scheduling section.
- In the Schedules (Gantt Chart) section, select the appropriate schedule.
- Select the Print grid icon (
 ) on the toolbar .
- In the dialog, review the paper size and format options and select OK.
- Go to Projects and select the appropriate project in the Quick Select section.
- On the Project Home page, select Scheduling Overview or Schedules in the Scheduling section.
- In the Schedules (Gantt Chart) section, select the appropriate schedule.
- Select the Print grid to Adobe PDF icon (
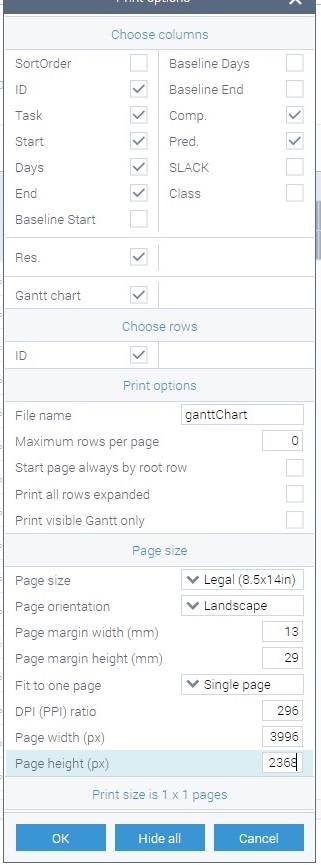
 ) and use the following suggested settings to export the Gantt chart in PDF format onto one page:
- The page size must be as follows assuming 0.25" margins:
- Paper size: Legal (8.5 x 14)
- Orientation: Landscape
- DPI = 296
- Page width = (14" - (0.25" x 2)) x 296 = 3,996
- Page height = (8.5" - (0.25" x 2)) x 296 = 2,368
- If the schedule is not exported appropriately, use alternative page sizes in landscape mode because it depends on the number of tasks in the schedule.
- Metric: A0, A1, A2, or A3.
- Us or Imperial: Arch A, Arch B, or Arch C.
- Select OK.
- Go to Projects and select the appropriate project in the Quick Select section.
- On the Project Home page, select Scheduling Overview or Schedules in the Scheduling section.
- In the Schedules (Gantt Chart) section, select the appropriate schedule.
- Select the Export grid data to your spreadsheet program icon () on the toolbar .
- In the dialog, review the format options and select OK.