Purchase order change order (PO CO)
Related information
You can use the PO CO feature in the Procurement section of projects to create change orders for approved purchase orders (POs). The PO CO feature in Sage Construction Management serves as a control mechanism that enables flexible, transparent, and accountable procurement management within dynamic construction environments.
Details
You can use the PO CO feature in Sage Construction Management to document changes in POs, which can occur due to several reasons, such as:
-
Design modifications, unforeseen site conditions, or client requests.
-
Fluctuation to the budget due to price changes, material substitutions, or vendor negotiations.
-
Vendors requiring formal documentation to confirm changes in material specifications, delivery schedules, or payment terms.
-
Construction projects requiring thorough documentation for compliance, billing, and dispute resolution.
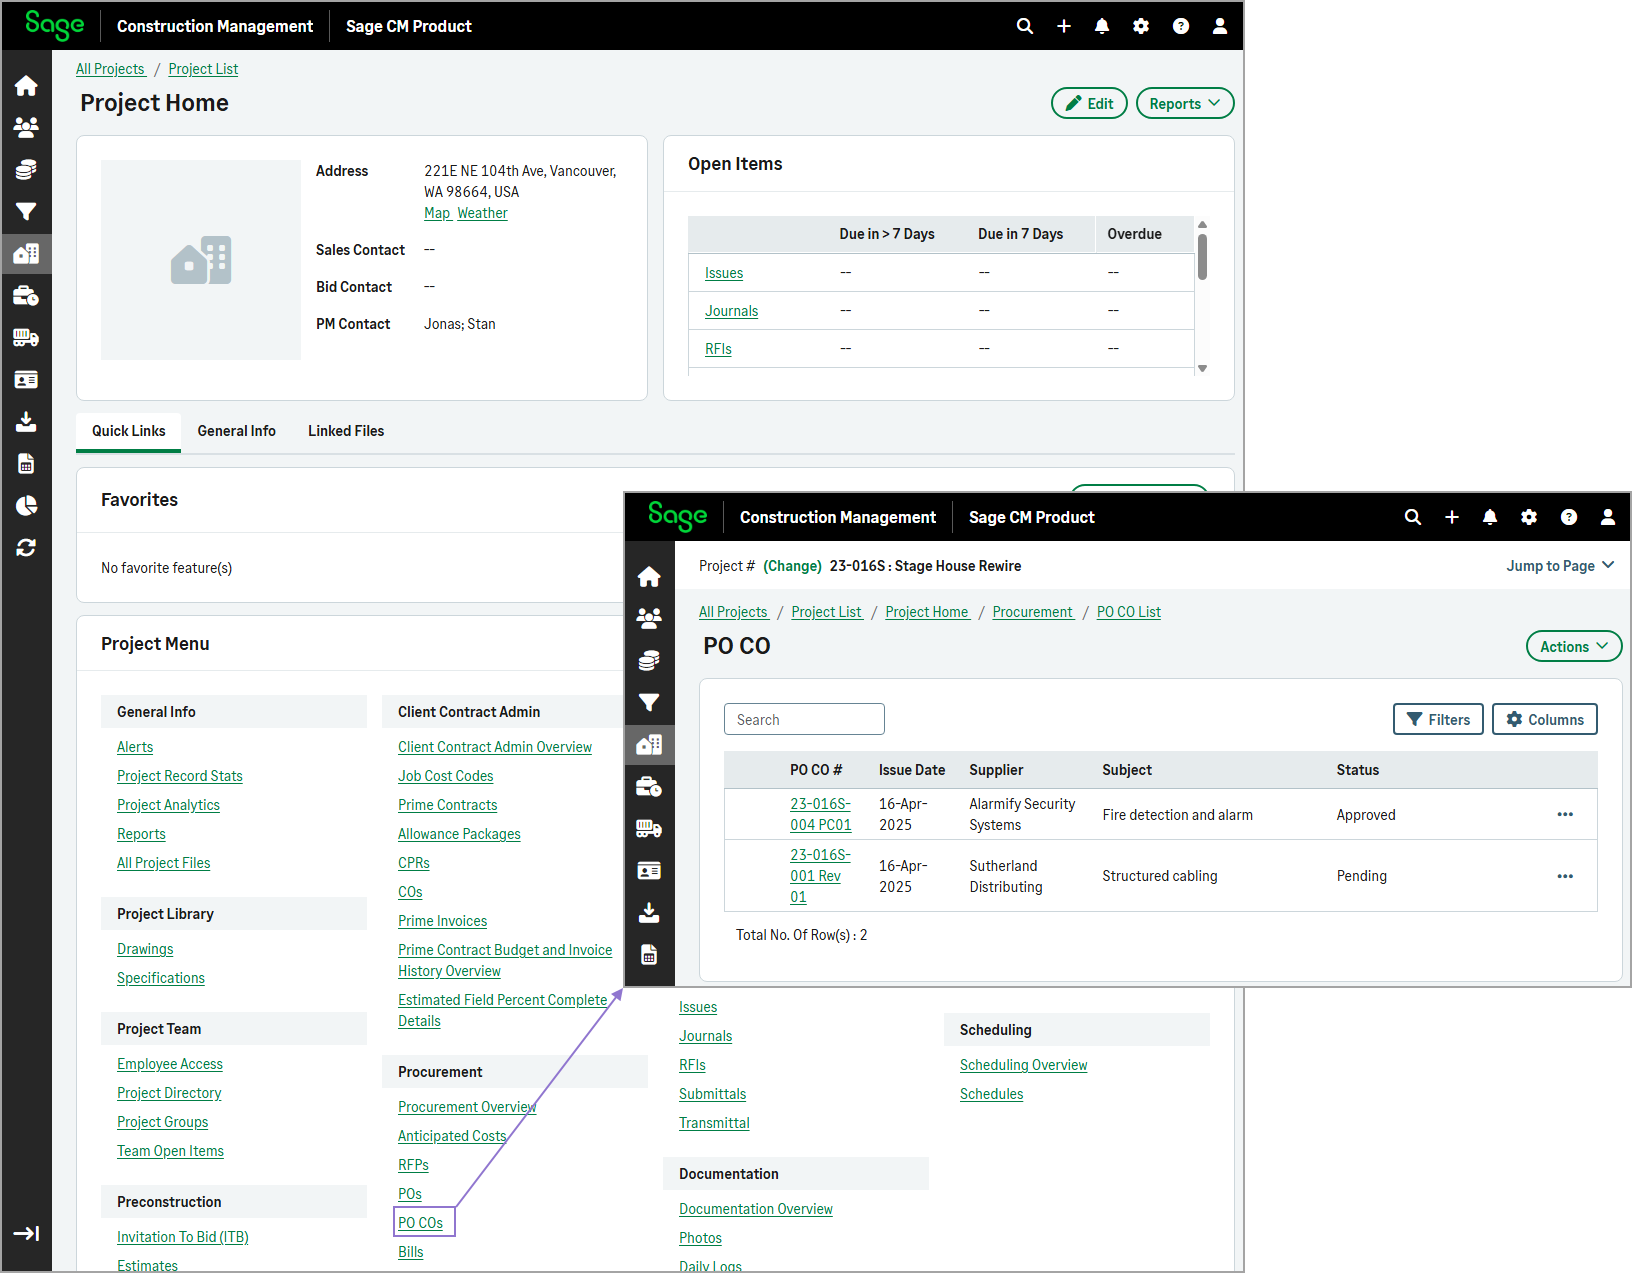
The PO CO feature is available in the Procurement section for projects.
You can create PO COs either manually or from existing approved POs. Each PO CO in Sage Construction Management applies to one PO only, which must be already approved. In a PO CO, you can change the quantity of an existing PO item or add a new item. You cannot change any other fields.
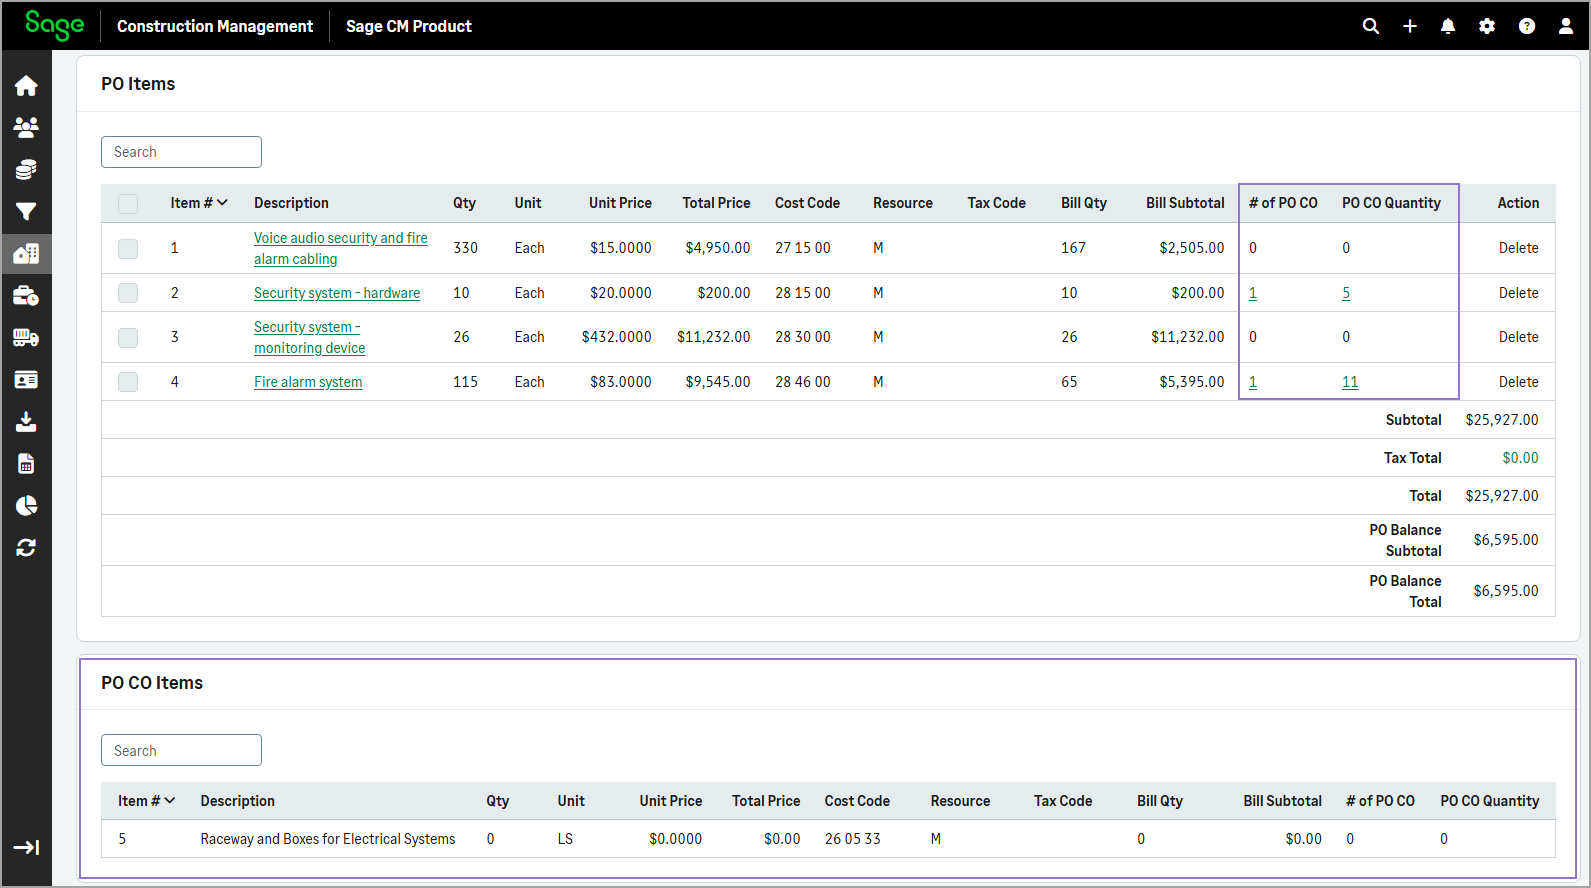
In the PO Information page, the list of PO COs is provided in the PO CO Summary section. For PO items that are included in PO COs the number of PO COs and the PO CO quantity is included in the PO Items section. Additional items that are included in the PO COs are listed in the PO CO Items section.
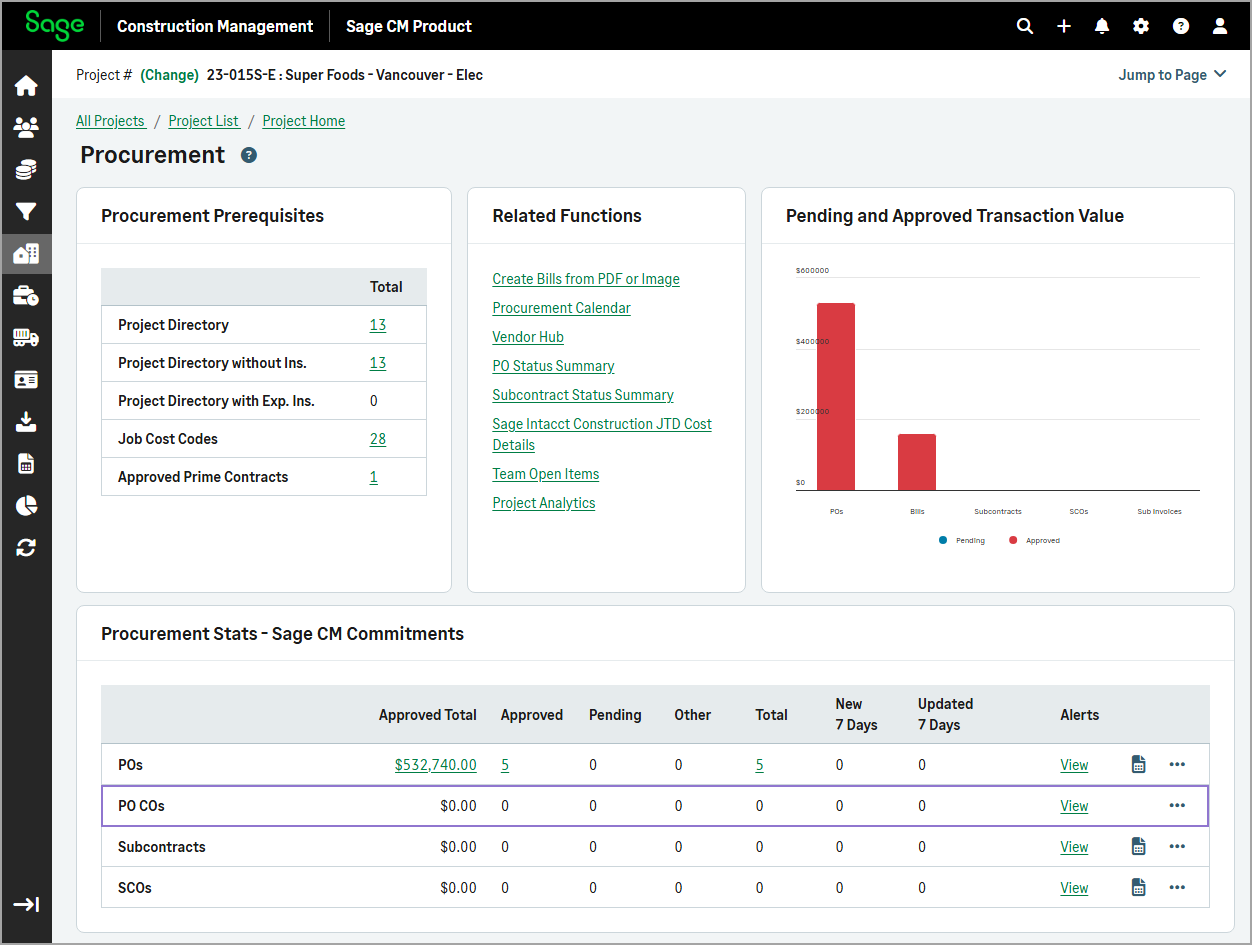
In the Procurement overview page, the PO COs row has been added in the Procurement Stats - Commitments section. It includes a summary of approved, pending, and other PO COs, and the approved total.
How it works
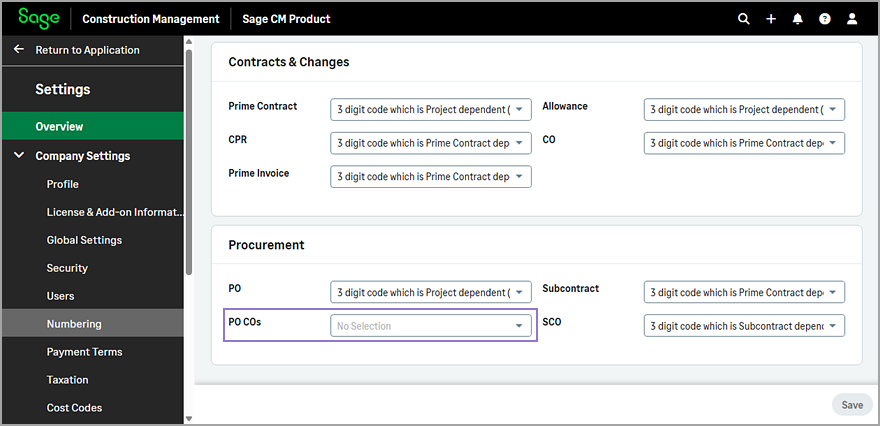
Specify the PO CO numbering
-
Go to Settings > Company Settings > Numbering.
-
Select the appropriate option in the PO COs dropdown.
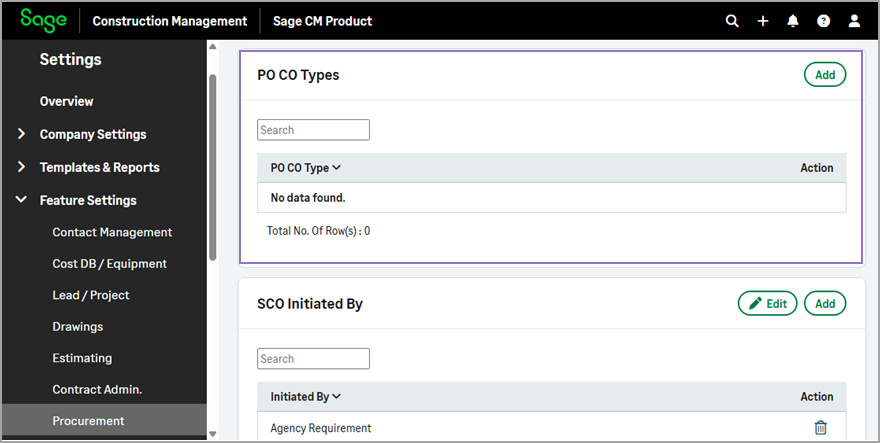
Specify the PO CO types
-
Go to Settings > Feature Settings > Procurement.
-
In the PO CO Types section, select Add.
-
Enter the appropriate PO CO type in the available field.
-
To add more PO CO types, select Add Another Entry and enter the type in the field.
Repeat this step until you’ve added all the types.
-
Select Save.
Create a PO CO manually
- On the Project Home page, select PO COs in the Procurement section.
- Select Actions > Add PO CO.
-
Optionally, update the Project or Prime Contract.
-
Select the Supplier Company and the PO.
-
In the PO Lines section, select the PO items that have a change to be included in the PO CO and enter the Quantity.
-
Enter the PO CO #.
-
Optionally, update the Order Number, Issue Date, or Subject as needed.
By default, the issue date is set to today's date and the subject is set to the selected PO's subject.
-
Optionally, select the PO CO Type.
-
Update the Status, if needed.
By default the status is set to Pending.
-
Optionally, select Link Related PO Files.
-
Select Finish.
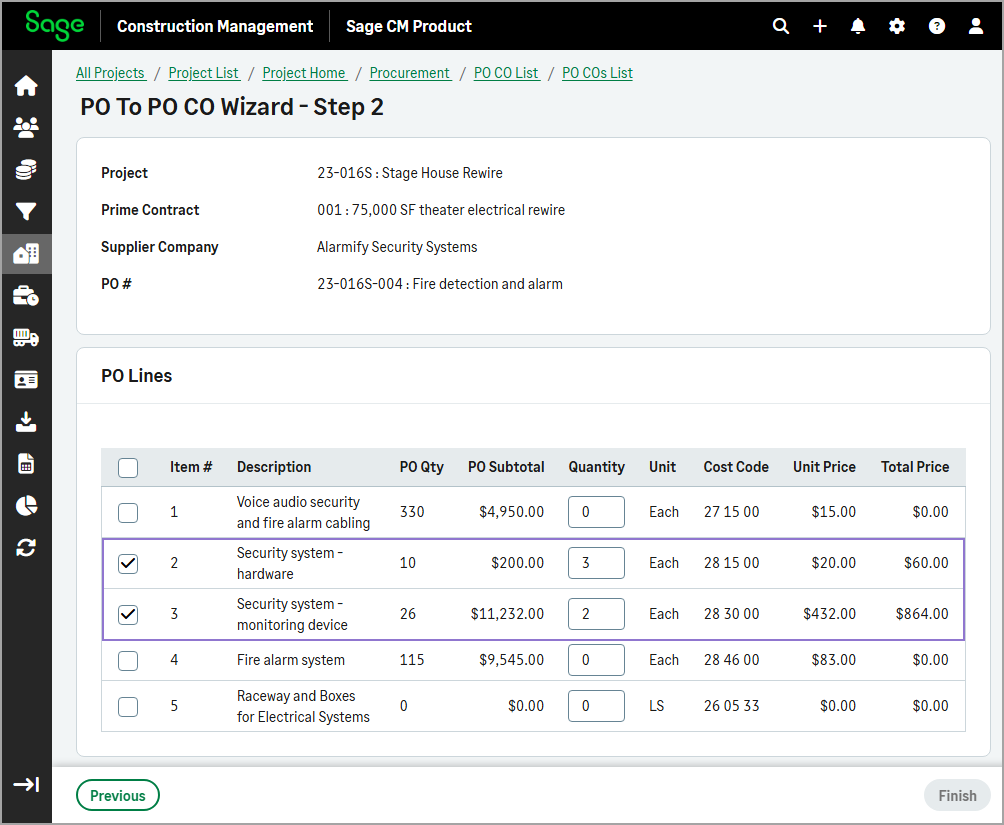
Create a PO CO from an approved PO
-
On the Project Home page, select POs in the Procurement section.
-
Select the appropriate approved PO from the list.
-
Select Actions > Create PO CO from PO.
In the PO To PO CO Wizard page, the Project, Prime Contract, Supplier Company, and PO fields will be pre-filled based on the selected PO.
-
In the PO Lines section, select the PO items that have a change to be included in the PO CO and enter the Quantity.
-
Enter the PO CO #.
-
Optionally, update the Order Number, Issue Date, or Subject as needed.
By default, the issue date is set to today's date and the subject is set to the selected PO's subject.
-
Optionally, select the PO CO Type.
-
Update the Status, if needed.
By default the status is set to Pending.
-
Optionally, select Link Related PO Files.
-
Select Finish.
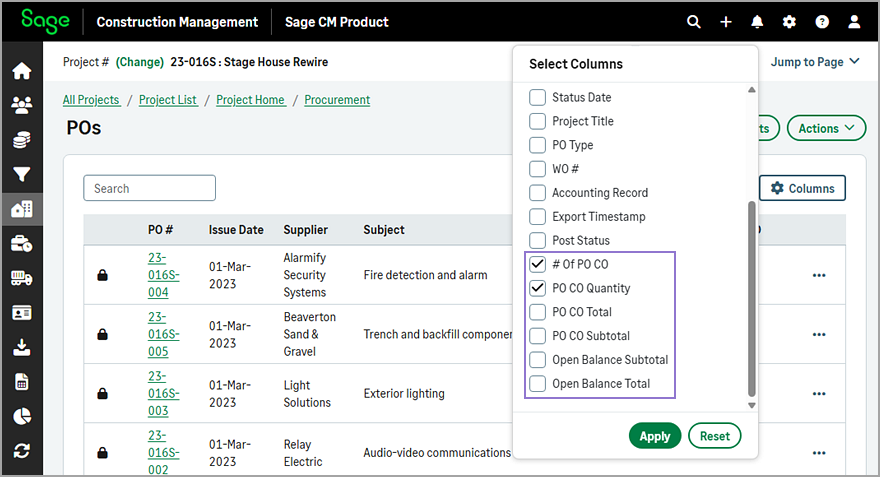
View PO CO information for a PO
-
On the Project Home page, select POs in the Procurement section.
-
To view PO CO information for each PO on the list, select columns and select one or more of the following options as needed:
-
# of PO CO
-
PO CO Quantity
-
PO CO Total
-
PO CO Subtotal
-
Open Balance Subtotal
-
Open Balance Total
-
-
Select Apply.
-
To view more information, select the appropriate PO from the list and review the information in the PO CO Items and PO CO Summary sections.
Edit a PO CO
-
On the Project Home page, select PO COs in the Procurement section.
-
Select the appropriate PO CO from the list.
-
To edit the header information, select Edit.
-
To edit existing PO CO items, select Edit List in the PO CO Items section.
-
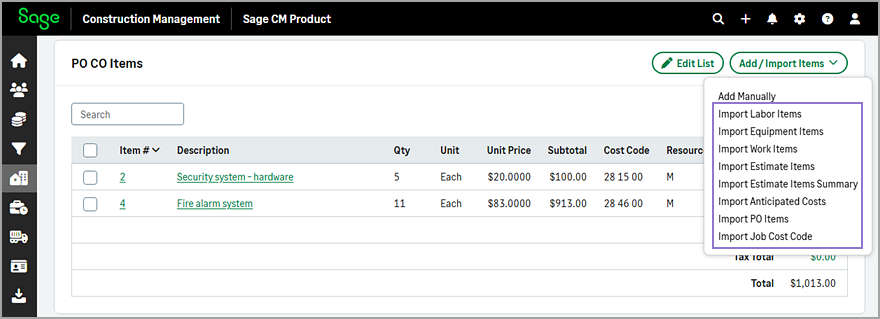
To add PO CO items manually, select Add / Import Items > Add manually in the PO CO Items section.
-
To import PO CO items, in the PO CO Items section, select Add / Import Items and select one of the available options as needed.